It’s been a long year of work, customizing an old 2007 Dodge Sprinter van into a chic modern camper van. You might have followed some of our progress in blogs and videos but now that the van is 98% done, we (myself and my ultra-talented husband Roger) wanted to round up all the work we did and the supplies we used.
You can look at a couple of the progress update blogs we did along the way, when we first began demolition, or as we started adding the cabinetry and storage and the bed platform, or dive right in here and get the full summary. (I’ve also detailed all the technology we added to the van here.)
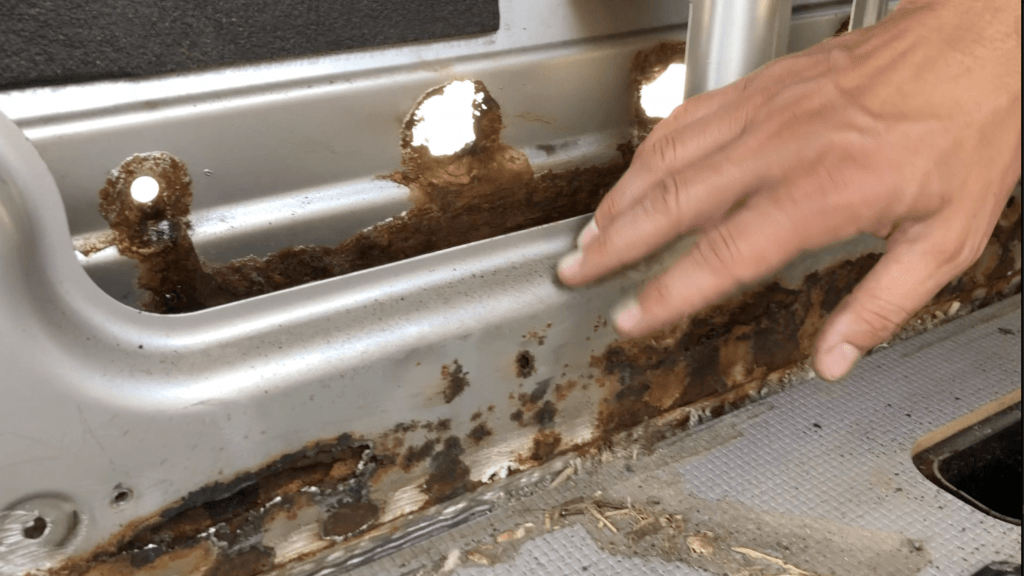
Fixing rust & doing body work: Sprinter van
The first issue we had when building a camper van was mitigating a substantial amount of rust we found underneath the rocker panels on the van. The rust was so bad it had made huge holes on the inside of the van, that gaped right through to the outside. We ground off as much rust as we could, primed it, and the used Bondo, a fibreglass filler, to fill the worst of the holes.
We covered everything over with rocker paint to offer more protection over the bottom of the van.
Camper van Lighting
Wanting reliable but low voltage lighting, we ordered some My Light brand adhesive-backed RGBW LED light strips and controllers from Amazon. LED lights draw minimal power, which is great when relying on a battery. Roger painstakingly soldered and wired everything up, connecting the light strips to small controllers, and connected it all to the battery.
This light system has a remote control too (but it did need programming), and the whole system works great. The lights are divided into two zones and we can have each one on/off and can even change the colours too! It really makes the van fun.
Plus, if we change the lights to a colour like red or orange, it keeps the bugs from being attracted to the inside.
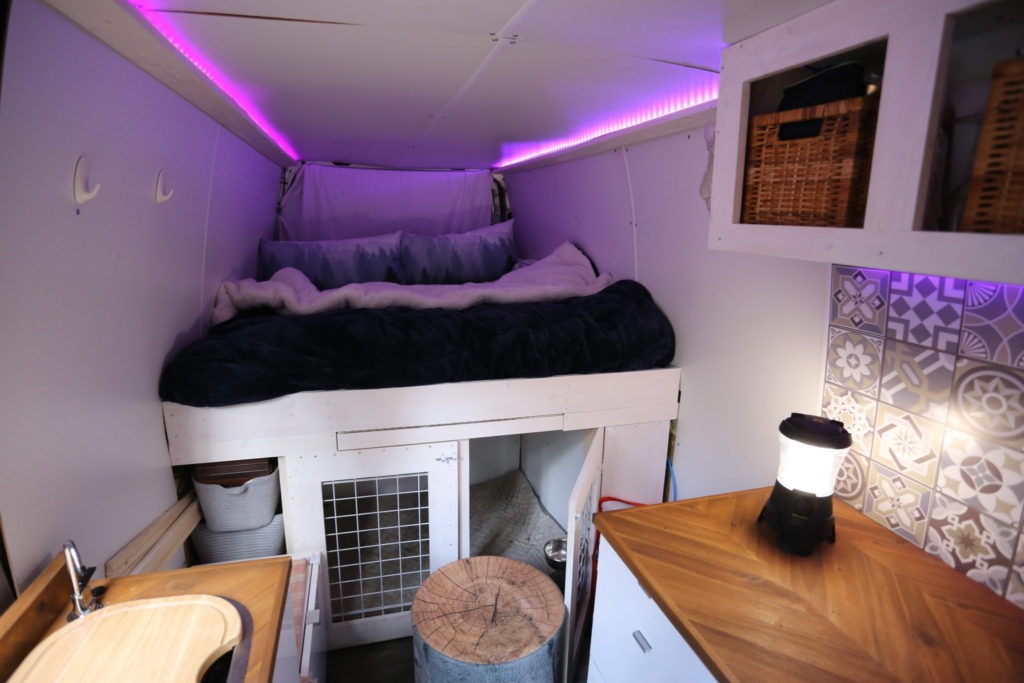
After installing the whole system, Roger also went back and added orange LED light strips underneath the bed platform in the ‘gear garage’/storage area so that we can easily access supplies in the dark. As a bonus, it can be easily switched on and off from in bed using a physical switch, and it creates a dim nighttime ambient glow if we want it.
Designing kitchen & cabinetry for a camper van
 We weighed a couple of options when designing the kitchen space. We could have gone custom-built, but in the end we chose Ikea white high-gloss cabinets. It’s a decision I’d definitely make again.
The cabinets are easy to assemble, you can build them in your basement or garage and stack them up, ready to install. They’re inexpensive too. We definitely saved hours over building our own particularly because we wanted a lot of drawers, and trying to build your own drawers and have everything fit perfectly is an art that takes lots of time.
We chose a sink cabinet with two doors, a cabinet for the fridge, a bank of three drawers, and a 4-drawer cabinet with recessed drawers and a door that covers the drawers. I wouldn’t recommend this drawer & door option; it doesn’t stay closed well and opening the door before opening the drawers in the small space is a pain and a tight fit. I thought it would help keep things tidy, but when I do this again, it will be all drawers.
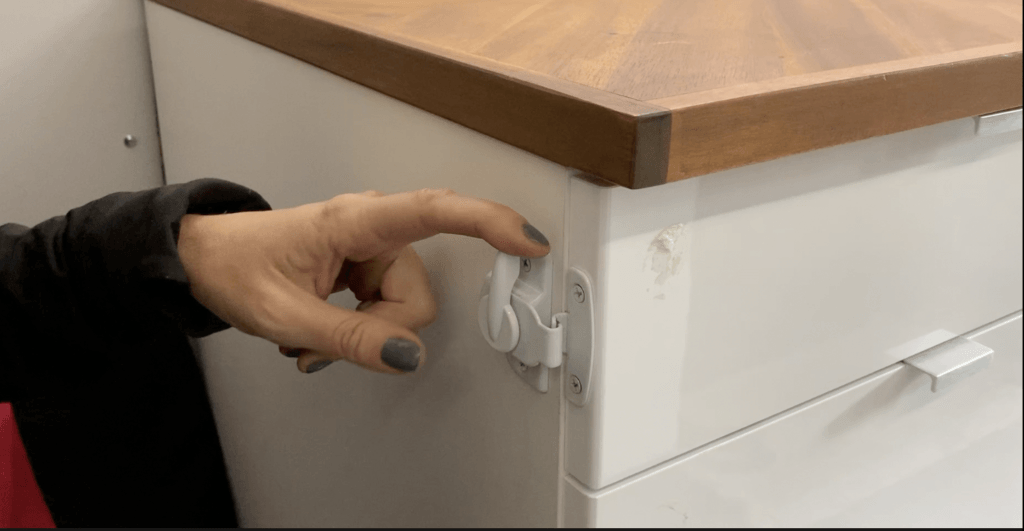
Sash locks for windows, on drawers.
Dealing with drawers: how to keep drawers closed in camper van
We struggled with how to keep all the drawers closed, shopping around on numerous RV supply websites to find a good solution but coming up empty.
Roger finally found some simple sash locks (about $3-6CAD ea at home improvement stores) meant for windows and they’re pure genius at keeping the drawers in place. They’ve been installed on the sides of the cabinets and are easy to twist to open or close. We’ll be putting these on all future van drawers.
Countertops for van build
On top of the cabinets we chose a pre-cut 4 x 8 sheet of herringbone patterned acacia wood counter top. The slice of counter was about $200 at a local home improvement store, and was just enough to cover all our counters.
 Campervan conversion: Custom overhead cabinet
 Campervan conversion: Custom overhead cabinet
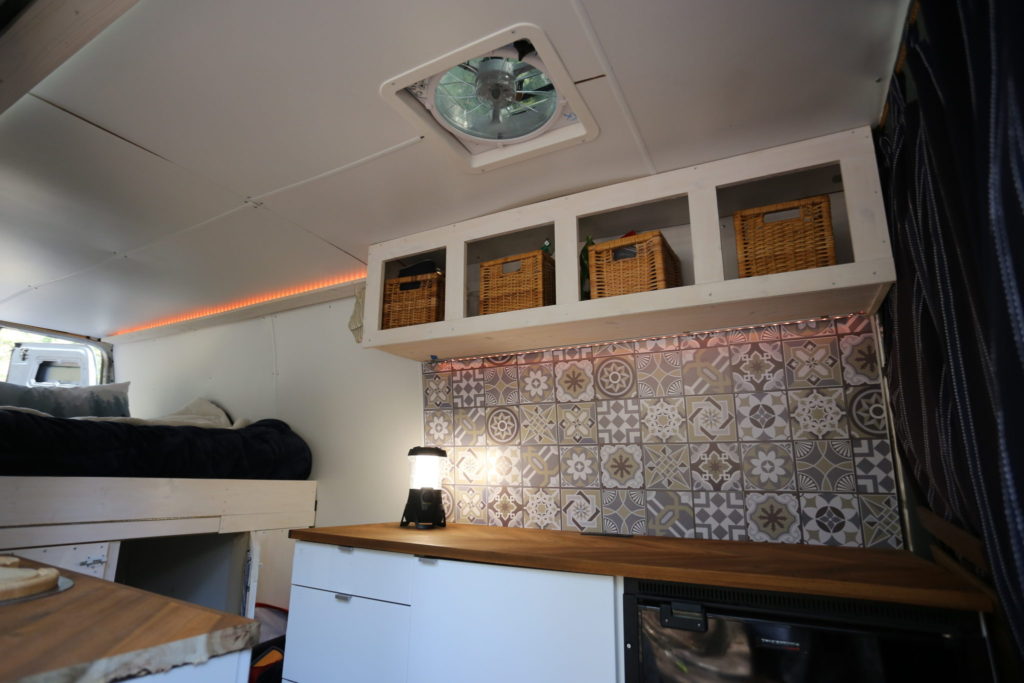
Roger did add a custom overhead cabinet with basket storage system when we realized the Ikea overhead cabinets were too big for the space. He made it from lumber, in a simple L-shape, and then he added a face to it with a lip to keep the baskets in. We whitewashed to wood to help it blend in with the Ikea cabinets.
Ventilation: which fan to choose for a camper van
 We did a lot of research into which fan would be best for the van, and also looking into having it professionally installed, thinking that cutting a gaping maw into the roof was a tad intimidating. Instead we opted to do it ourselves. In the end it wasn’t hard; you just need to make sure you have the right stuff to seal it tightly against water incursion: Butyl caulk goes against the metal and between the fan and it compresses when the fan gets screwed down. The whole fitting is covered with Self-Levelling lap Sealant.
All our research pointed to MaxxFan as the preferred option.
The MaxxFan provides both passive ventilation and active ventilation. We can crack the lid to keep air circulating and prevent condensation, turn it on to either suck air out of the van, like when we’re cooking, or to bring air in for cooling.
The MaxxFan comes with a remote control, but it seems the IR sensor isn’t well placed, and the remote only works when you’re standing right underneath it.
A rain sensor in the fan keeps it closed, and water out. So far, so good and we’re happy with the MaxxFan as our choice.
How to get water in the camper van
We knew we wanted a water hook up for the van. Whether for brushing our teeth, washing up or even drinking, we decided to add a small sink and water station.
Our sink was found on Amazon; it’s a bar sink with cutting board top, a great space saver. Plus, with the inlcuded draining rack in the bottom of the sink it keeps cloths and sponges dry, and gives us a place to stash dirty dishes.
The tap is a marine or RV faucet, hooked up to a small marine pump, (about $30CAD each) and the water system underneath in the cabinet is two blue water jugs; one for fresh, the other for grey water. The pump and faucet were also found on Amazon and the jugs we got from a camping supply store. They’re held in place by large eye bolts and wratchet-straps.
Which Fridge for my campervan?
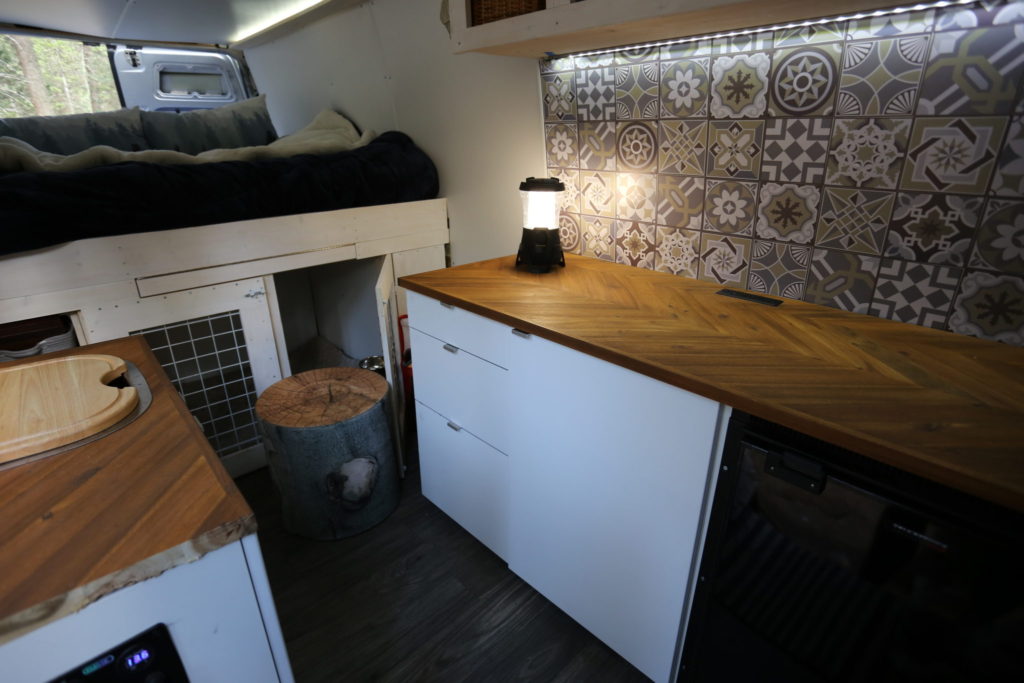 We are big foodies and we like to cook and eat well when we’re traveling or even camping. While many folks opt for tiny bar fridges or chest fridges, we were not down with that. We chose the largest fridge we could find from TruckFridge. It’s adjustable and has a small freezer, and we couldn’t be happier with it.
We installed it into one of the Ikea cabinets, though we did have to make some adjustments to the cabinet to get it to fit securely.
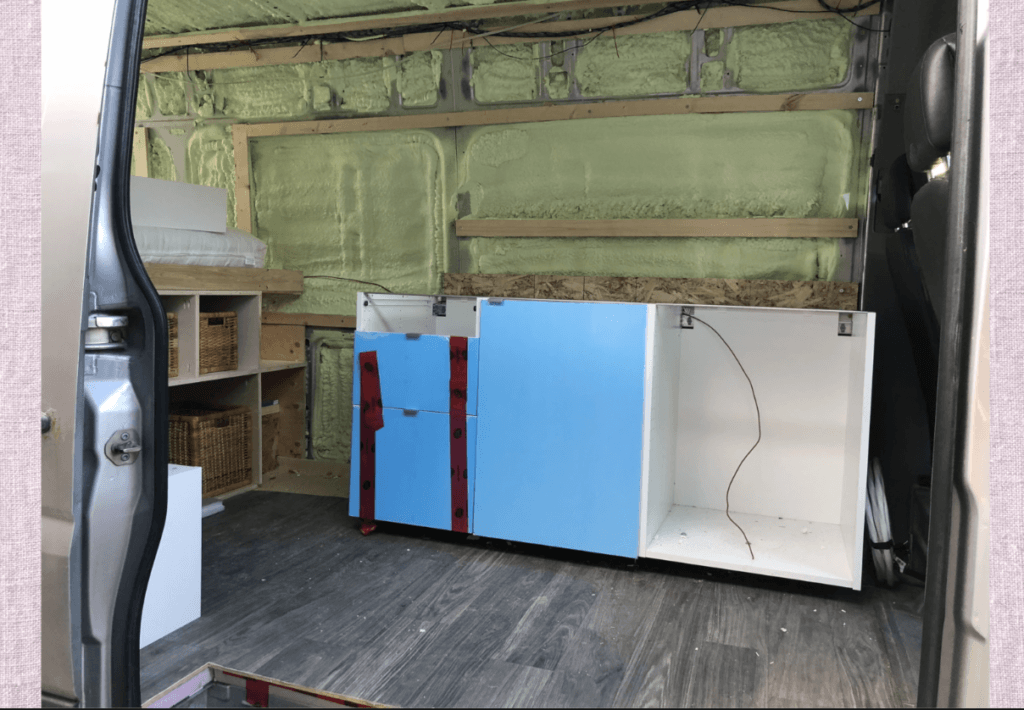
Walls & Insulation
We put 1 x 3” spruce lumber along the walls to create our structure inside the van. We used the Riv Nuts system to create a solid, safe base to screw the lumber into.
The first thing we opted to do to the van after the ribs were up was spray foam the inside.
While there’s plenty of ways to insulate your camper van, after a lot of reading we opted to have our van professionally spray foamed. From our research it’s the most cost effective, fastest and most reliable insulation method. While you might be able to DIY some stuff with cans of gap filler or cutting and pasting thermal sheeting, we wanted to do it right (cans of spray insulation or gap filler, used improperly can actually badly warp the sides of your van. Google it.)
We found a local company that spray foams refrigerated trucks and such and it cost about $800CAD. Prices varied quite a bit, so call around, and make sure you ask what thickness of insulation you’ll get.
Interior walls: hard board panelling
We’ve seen plenty of YouTube videos where the builders use tongue-in-groove boards to do the interior walls. Because our overall feel was chic modernist cottage, we wanted white walls, and opted for plain white hardboard panelling for about $20 per sheet and we ended up using about 10-12 sheets in total.
While we opted to piece together the walls around the bed platform and the kitchen cabinets to save a bit of money, in a do-over situation, I’d just put wall board all over the whole van; top to bottom, front to back.
With our piecemeal approach, we were very limited in making design changes, and there’s a few spots where the underneath shows through. Piecing together the wallboard and seaming it wasn’t easy either, because this stuff is big and floppy and flexible. Doing it over, I’d eschew the plastic seam strips you can get to butt the joints together, and just finish it with wood strips laid over the seams, painted white.
We also opted to put the wallboard onto our ribs using screws, but there’s no great option for hiding the screws, so next time we’ll be investigating using adhesive to secure the wallboard.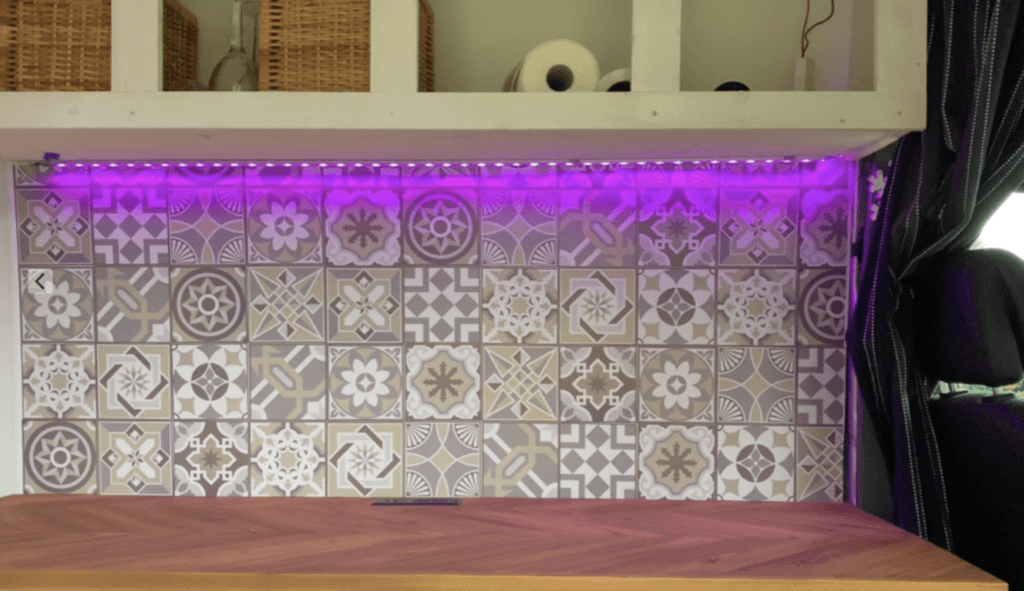
How to install a Backsplash in your camper van
I’d seen a nice tiled backsplash in a camper van and was surprised to discover it was made from stick-on tiles. Makes sense, since doing actual tiles would probably be a big mistake given the constant motion of the vehicle and all the vibration. Real tiles would crack and fall off in no time. But still the look is homey and nicely finished.
I surfed around online and found some beautiful Spanish tile lookalike stickers on Wayfair. They’re ultra thin, and they were a breeze to put up, and they’ve lasted well with no peeling, despite major temperature fluctuations. The small area I covered cost me probably about $60CAD.
What flooring is best in a camper van?
When prepping the floor area, we used adhesive to secure wood strips between the gaps in the waffle-like floor of the van, creating a flat surface for step two, our 2” pink foam insulation board panels. We wanted the van floor to be well insulated and quiet, and this was a great solution. A 8.5mm fir subfloor went over that.
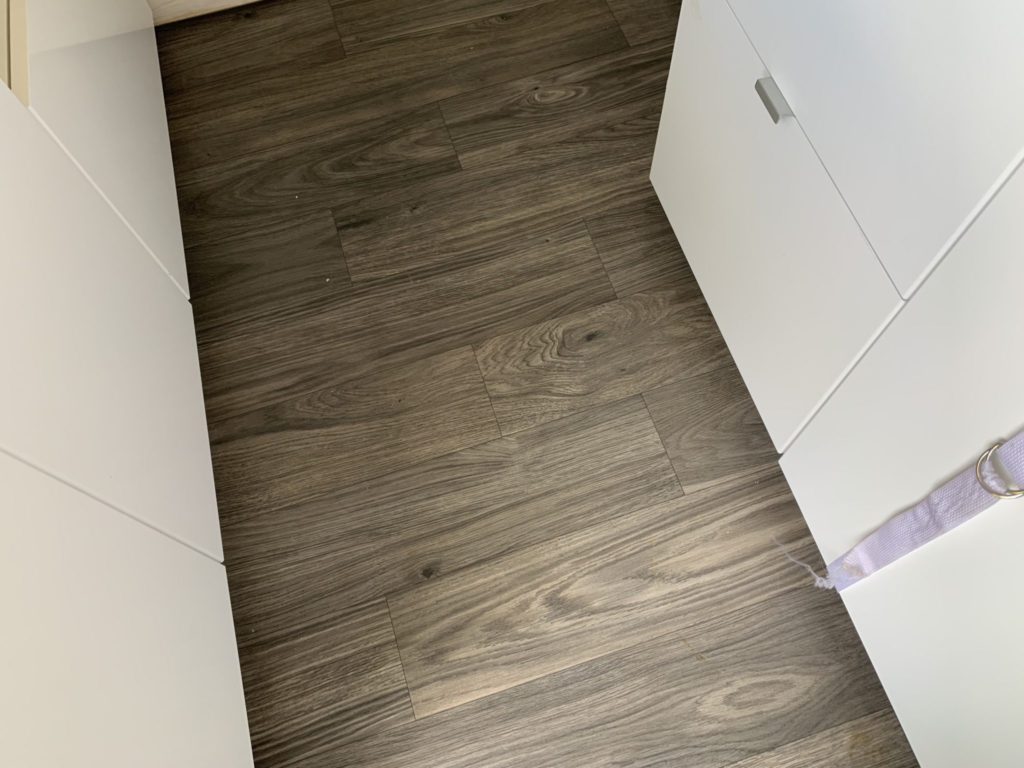
Searching for an ideal flooring system was no small feat. Initially someone recommended vinyl click-lock plank flooring, but after trying to install it, and watching the click-lock edges splinter every time we tried to hammer them together, that all went back to the home improvement store and we found some inexpensive vinyl roll flooring.
We shopped at a few discount flooring stores and bought the nicest wood-look vinyl they had for about $250CAD. We chose only enough to lay in the living area, but again, doing this over I would lay floor over the whole van. Why? Because we made some modifications to the van, like removing a bench seat, and modifying the van to have a dog kennel, we had exposed edges where the flooring didn’t meet. We tried to save a few bucks, but now we have ugly gaps in the floor that will need to be addressed. For an extra $50 or $100 we could have had flooring all over, allowing us to make design adjustments more easily and so they’d look better in the end.
The vinyl we chose was quite thin and it’s already gouged in a couple spots, so next time, we’re looking at doing a ‘drop n done’ vinyl plank option.
How we handled electrical in the Sprinter van
We are not electricians. Please don’t take this as advice, it’s just what worked for us.
We installed a 12 volt electrical system with 100 Amp hour battery. It charges off the main van battery while we drive, and will last us between 12 and 24 hours, depending on what we’re running. Connected to the battery are the MaxxFan, TruckFridge, LED lights, the small marine water pump and USB plugs for phone charging.
The first major tech we added was an AC inverter so we could use regular powered appliances and gadgets in the van. We connected an AC and USB power bar to the inverter and we flush-mounted the face of the power bar into the kitchen counter.
Camper van Solar Power: why we chose Renogy
Since we’re finding that we need more power than the single battery can supply, we added solar panels from Renogy. We’ve done the math on our power needs, both current and future and opted for two Renogy 100W 12V mono panels.
We laid the panels out and mounted them to corrosion-resistent powerstrut metal rails, and secured the array to the roof with stainless steel fasteners.
Then we ran the cable along the roof, and in through a hole in the rear of the van, connecting it to the solar charge controller.
Once everything is set up and connected, your system will start generating power as soon as the sun comes up. I could see ours working as soon as the wires connected. After our first full day of sunlight it was enough to keep the battery topped off and ready to use.
So far we’re really happy with the solar set up and would definitely do it again sooner next time. If you’re looking for more on the solar system we installed, read the full blog here. And if you’re looking to get a system of your own, use our Renogy Coupon Code “TechGadgetsCanada” or click this link for a discount off your purchase of Renogy Solar panels and some of their gear. We’re very happy with our choice.
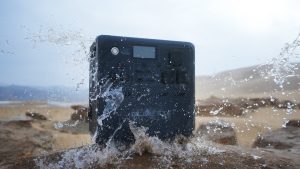
We’ve also got a new device called the Renogy Phoenix PHX100. It’s a small soda can-sized power bank that can recharge our phones 6-9 times, or a laptop 1-2 times. This is our ‘just in case’ backup. We’re also contemplating a Renogy Lycan AC generator…
Building the bed platform
Roger built the bed platform out of dimensioned lumber, creating a slat bed very similar to an Ikea bed. 2x4s are bolted to the walls of the van and then 1×3 slats are laid between with a support underneath the middle of the span. You could also use metal unistrut or powerstrut.
Dog kennel for camper van
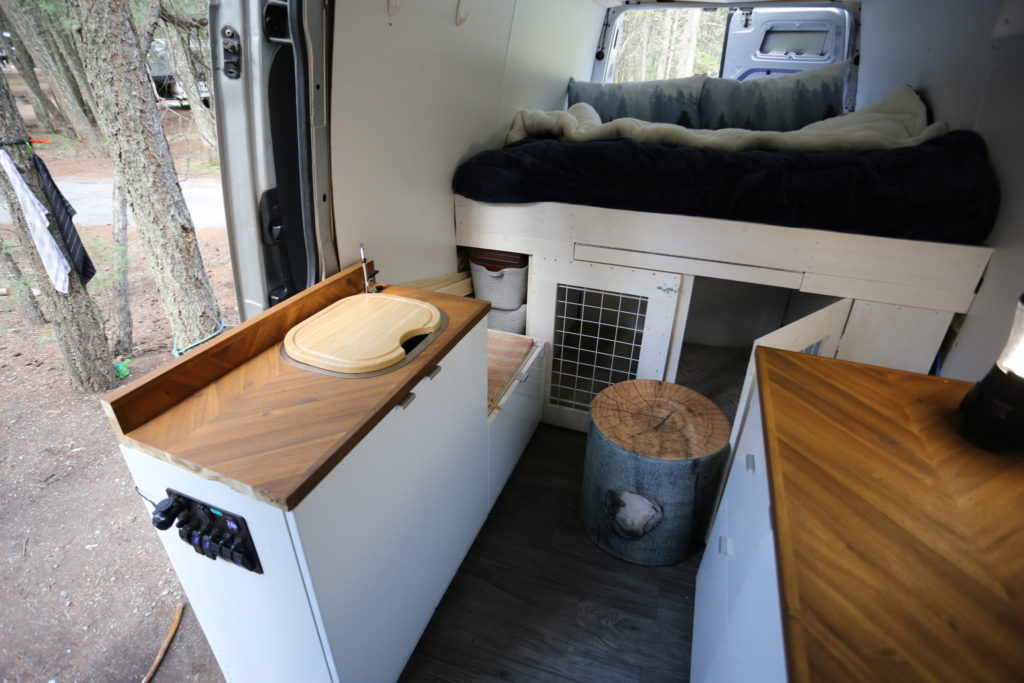
Underneath the bed platform in the cabin area we built in a dual dog kennel with doors. It keeps our pups Kica and Rainie safe and comfy while we travel, but this space easily converts into storage too.
Seating & table
Under the bed platform is a hidden slide-out butcher block table. A piano hinge hides the table compartment, and locking drawer slides let the table pull out and lock in place. We made it the right height for working or dining. The seats are a drawer-bench seat on one side and a wood-look stool on the other. This allows our dining area to be a bit flexible, hiding away easily when more space it needed.
Overall we’re so happy with this van. We’ve taken it to the Rocky Mountains of Alberta and BC, and to California and back. While its age means we might not have it around forever, it’s inspired us to do more when it comes to vanlife.
A new 2017 Ford Transit is now parked in our driveway…. If you’ve got ideas for us on how to use it or what you think we should put into it, let me know…